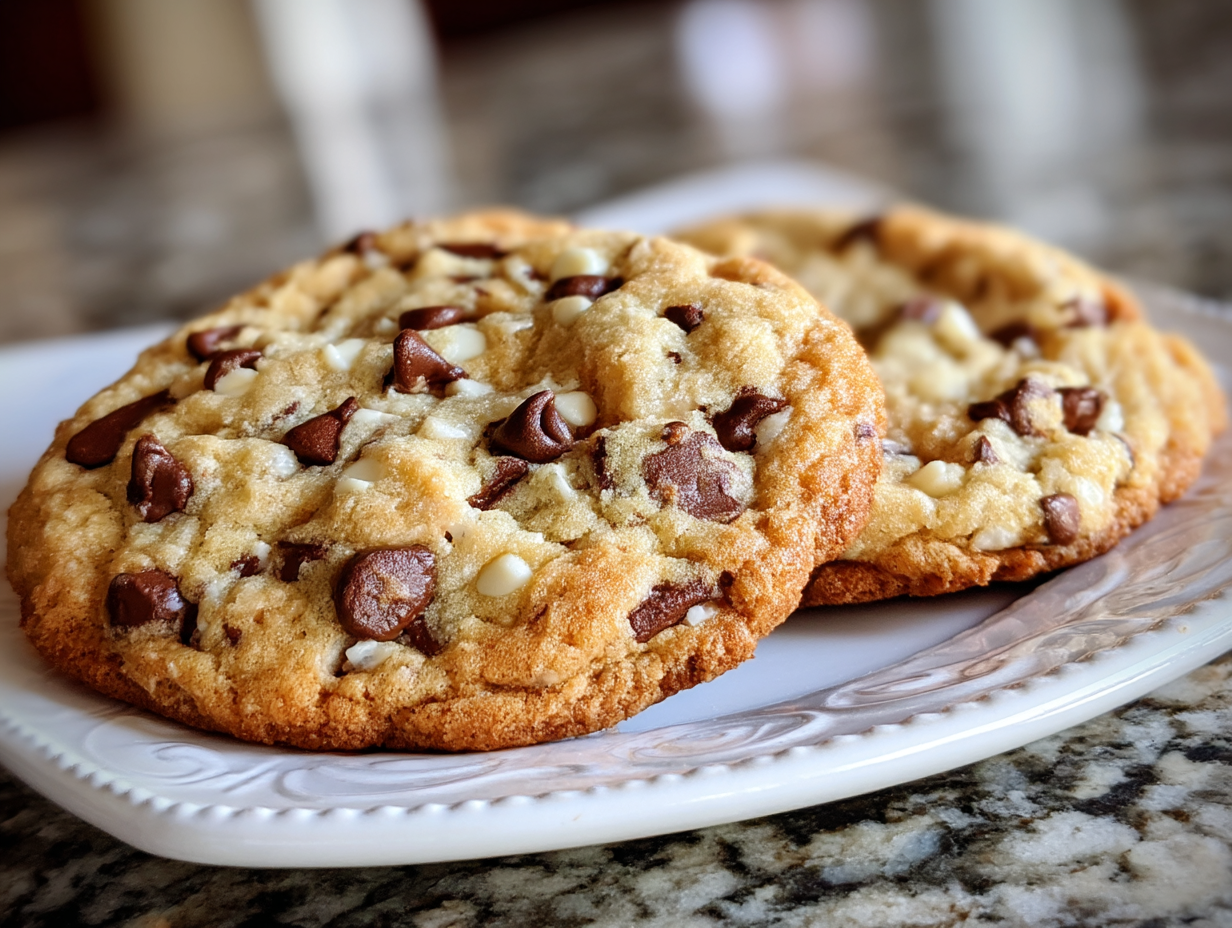
Few treats are as universally loved as the classic Nestlé Toll House chocolate chip cookie. Whether you’re a seasoned baker or a beginner, this iconic recipe has stood the test of time, delivering soft, chewy, and utterly delicious cookies that bring joy to every bite. In this article, we’ll dive deep into the history, ingredients, and step-by-step instructions for making the perfect Nestlé Toll House chocolate chip cookie recipe. Along the way, we’ll share tips, tricks, and variations to help you customize this timeless treat to your liking. So, grab your apron, preheat your oven, and let’s get baking!
Table of Contents
The History of the Nestlé Toll House Chocolate Chip Cookie Recipe
The Origins of the Nestlé Toll House Cookie
The story of the Nestlé Toll House chocolate chip cookie recipe begins in the 1930s with Ruth Wakefield, a talented innkeeper and baker. Ruth and her husband owned the Toll House Inn in Massachusetts, where she served homemade meals and desserts to guests. One day, while preparing her popular Butter Drop Do cookies, Ruth decided to chop up a bar of Nestlé semi-sweet chocolate and add it to the dough. Little did she know, this simple act would create one of the most beloved desserts in history.
The cookies were an instant hit, and word of their deliciousness spread like wildfire. Soon, Ruth’s recipe was published in a Boston newspaper, and the rest, as they say, is history. Nestlé took notice of the recipe’s popularity and struck a deal with Ruth to print her recipe on their chocolate bars. Eventually, they even started selling Nestlé Toll House semi-sweet chocolate chips, making it easier than ever for home bakers to recreate Ruth’s masterpiece.
Why the Nestlé Toll House Recipe Became a Classic
What makes the Nestlé Toll House chocolate chip cookie recipe so special? For starters, it’s the perfect balance of flavors and textures. The combination of butter, sugar, and vanilla creates a rich, caramel-like base, while the semi-sweet chocolate chips add a delightful contrast of sweetness and melt-in-your-mouth goodness.
Moreover, the recipe’s simplicity is its strength. With just a handful of ingredients and straightforward instructions, even novice bakers can achieve bakery-quality results. Over the decades, this recipe has become a staple in households worldwide, passed down through generations and adapted to suit modern tastes. It’s not just a cookie—it’s a piece of culinary history that continues to bring people together.
Ingredients for the Perfect Nestlé Toll House Chocolate Chip Cookies

Essential Ingredients for Authentic Flavor
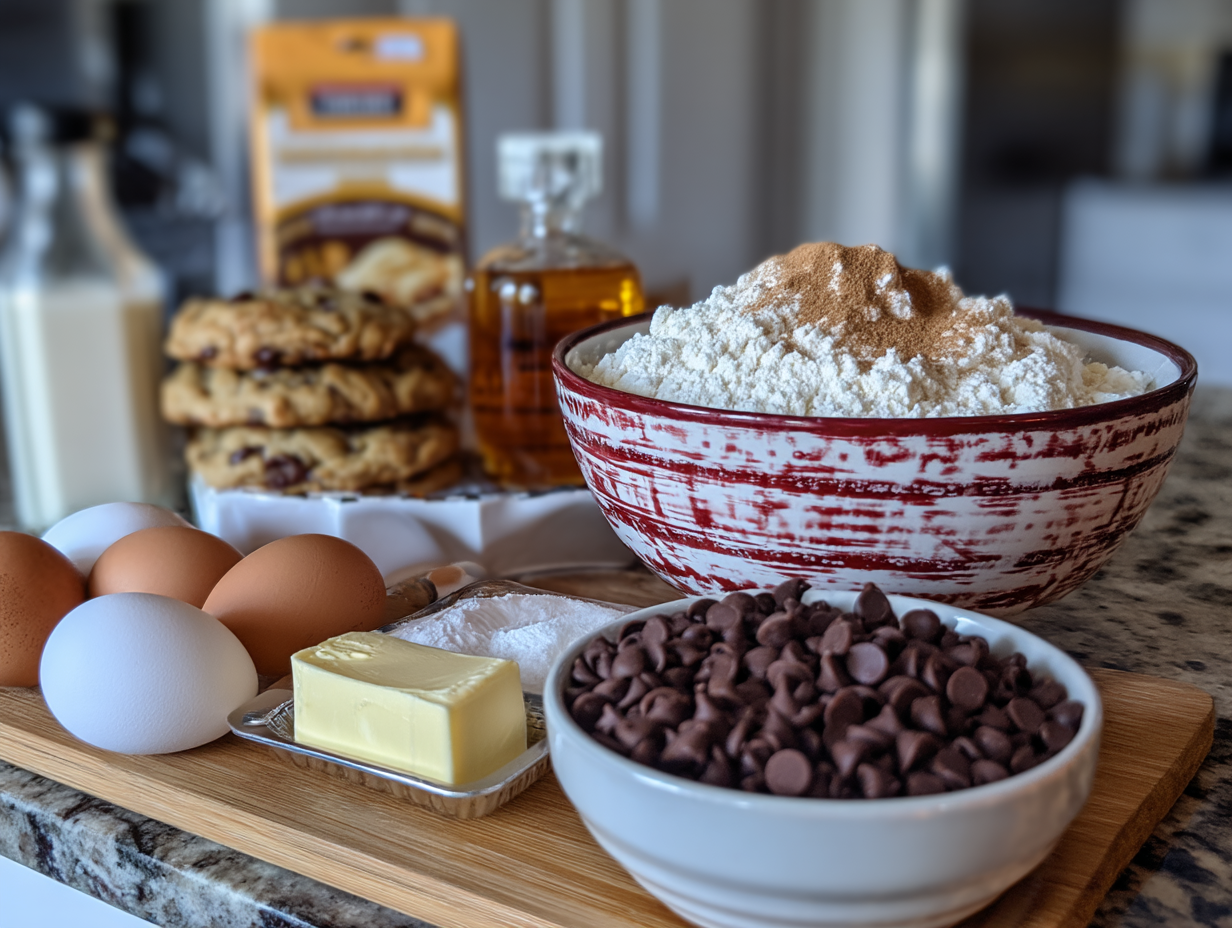
When it comes to baking the perfect Nestlé Toll House chocolate chip cookie recipe, the ingredients matter. Each component plays a crucial role in creating that iconic taste and texture we all love. Here’s what you’ll need:
- Butter: Use unsalted butter for the best flavor. It should be softened but not melted, as this helps create the right cookie texture.
- Granulated and Brown Sugar: The combination of both sugars gives the cookies a perfect balance of sweetness and chewiness. Brown sugar adds moisture, while granulated sugar helps with spreading.
- Eggs: Large eggs act as a binder, holding the dough together and adding richness.
- Vanilla Extract: A splash of pure vanilla extract enhances the overall flavor profile.
- All-Purpose Flour: This provides structure to the cookies. Be sure to measure it accurately to avoid dry or dense cookies.
- Baking Soda: A leavening agent that helps the cookies rise and spread.
- Salt: Just a pinch balances the sweetness and intensifies the flavors.
- Nestlé Toll House Semi-Sweet Chocolate Chips: The star of the show! These chips melt perfectly, creating those gooey pockets of chocolate we all crave.
Optional Add-Ins and Substitutions
While the classic Nestlé Toll House chocolate chip cookie recipe is perfect as is, you can always tweak it to suit your preferences. For instance, if you’re a fan of dark chocolate, swap the semi-sweet chips for dark chocolate ones. Alternatively, add a cup of chopped nuts like walnuts or pecans for a crunchy twist.
If you’re baking for someone with dietary restrictions, don’t worry! You can easily adapt the recipe. Use gluten-free flour for a gluten-free version or replace the eggs with flax eggs for a vegan alternative. The possibilities are endless!
Tips for Measuring Ingredients Accurately
Baking is a science, and precision is key. To ensure your cookies turn out just right, follow these tips:
- Use a kitchen scale for the most accurate measurements, especially for flour.
- Spoon flour into your measuring cup and level it off with a knife—don’t scoop directly from the bag.
- Make sure your butter is at room temperature before creaming it with the sugars.
By using the right ingredients and measuring them carefully, you’re already halfway to baking the perfect batch of Nestlé Toll House chocolate chip cookies.
Step-by-Step Instructions for Baking Nestlé Toll House Cookies
Preparing Your Kitchen and Tools
Before you start mixing, it’s important to get your kitchen ready. Gather all your tools: a stand mixer or hand mixer, mixing bowls, measuring cups and spoons, a cookie scoop, and baking sheets. Preheat your oven to 375°F (190°C) and line your baking sheets with parchment paper or silicone mats to prevent sticking.
Mixing the Dough: A Detailed Guide
- Cream the Butter and Sugars: In a large bowl, beat 1 cup (2 sticks) of softened butter with ¾ cup granulated sugar and ¾ cup packed brown sugar until the mixture is light and fluffy. This usually takes about 2-3 minutes.
- Add Eggs and Vanilla: Beat in 2 large eggs, one at a time, followed by 1 teaspoon of vanilla extract. Make sure each egg is fully incorporated before adding the next.
- Combine Dry Ingredients: In a separate bowl, whisk together 2 ¼ cups of all-purpose flour, 1 teaspoon of baking soda, and 1 teaspoon of salt.
- Gradually Add Dry Ingredients: Slowly mix the dry ingredients into the wet ingredients until just combined. Overmixing can lead to tough cookies, so stop as soon as the flour disappears.
Folding in the Chocolate Chips
Now comes the fun part—adding the chocolate! Gently fold in 2 cups of Nestlé Toll House semi-sweet chocolate chips using a spatula. Be sure to distribute them evenly throughout the dough for a perfect chocolate-to-cookie ratio in every bite.
Scooping and Baking the Cookies
- Scoop the Dough: Use a cookie scoop or tablespoon to drop rounded balls of dough onto your prepared baking sheets. Leave about 2 inches between each cookie to allow for spreading.
- Bake to Perfection: Bake in the preheated oven for 9-11 minutes, or until the edges are golden brown but the centers are still soft. Remember, the cookies will continue to cook slightly on the baking sheet after you remove them from the oven.
- Cool and Enjoy: Let the cookies cool on the baking sheet for 2 minutes before transferring them to a wire rack to cool completely.
By following these steps, you’ll have a batch of Nestlé Toll House chocolate chip cookies that are soft, chewy, and absolutely irresistible. Stay tuned for Part 4, where we’ll share tips and tricks to take your cookies to the next level!
Tips and Tricks for Perfect Nestlé Toll House Cookies
How to Achieve the Perfect Cookie Texture
The Nestlé Toll House chocolate chip cookie recipe is known for its versatility—you can make them soft and chewy or crispy and crunchy, depending on your preference. Here’s how:
- For Soft and Chewy Cookies: Underbake them slightly by removing them from the oven when the edges are set but the centers are still soft. They’ll firm up as they cool.
- For Crispy Cookies: Bake them a minute or two longer until they’re golden brown all over. You can also use a bit more granulated sugar in the dough to encourage spreading.
Another pro tip? Chill the dough for at least 30 minutes before baking. This helps prevent the cookies from spreading too much and gives them a thicker, chewier texture.
Storing and Freezing Cookie Dough
If you’re not planning to bake all the cookies at once, don’t worry! The dough can be stored in the fridge for up to 3 days or frozen for up to 3 months. Here’s how:
- Refrigerating: Wrap the dough tightly in plastic wrap or store it in an airtight container. When you’re ready to bake, let it sit at room temperature for 10-15 minutes before scooping.
- Freezing: Scoop the dough into individual portions and place them on a baking sheet. Freeze until solid, then transfer to a freezer bag. Bake directly from frozen, adding an extra minute or two to the baking time.
Troubleshooting Common Cookie Problems
Even the best bakers run into issues sometimes. Here’s how to fix common problems:
- Cookies Spread Too Much: This usually happens if the butter is too soft or the dough is too warm. Chill the dough before baking, and make sure your baking sheets are cool before adding new batches.
- Cookies Don’t Spread Enough: If your cookies are too thick, try flattening the dough balls slightly before baking. Also, check that your baking soda is fresh.
- Overbaked or Underbaked Cookies: Keep a close eye on the baking time, as oven temperatures can vary. Use an oven thermometer to ensure accuracy.
With these tips, you’ll be able to bake the perfect batch of Nestlé Toll House chocolate chip cookies every time.
Variations of the Nestlé Toll House Chocolate Chip Cookie Recipe
Gluten-Free and Vegan Adaptations
The Nestlé Toll House chocolate chip cookie recipe is so versatile that it can easily be adapted for dietary needs. For a gluten-free version, simply swap the all-purpose flour for a gluten-free blend. Make sure it includes xanthan gum for the right texture.
For a vegan version, replace the butter with plant-based margarine and the eggs with flax eggs (1 tablespoon ground flaxseed mixed with 3 tablespoons water per egg). Use vegan chocolate chips to keep the recipe entirely plant-based.
Seasonal and Holiday Variations
Why not give the classic recipe a festive twist? During the holidays, add a teaspoon of peppermint extract and swap the chocolate chips for crushed candy canes. In the fall, mix in a teaspoon of pumpkin spice for a cozy, autumnal flavor.
You can also decorate your cookies for special occasions. Dip half of each baked cookie in melted white chocolate and sprinkle with colored sugar or sprinkles for a festive touch.
Mini Cookies and Cookie Bars
If you’re short on time or want to mix things up, try making mini cookies or cookie bars. For mini cookies, use a teaspoon to scoop the dough and reduce the baking time to 6-8 minutes.
For cookie bars, press the dough into a greased 9×13-inch baking pan and bake at 375°F (190°C) for 20-25 minutes. Let them cool completely before cutting into squares.
These variations prove that the Nestlé Toll House chocolate chip cookie recipe is more than just a classic—it’s a canvas for creativity.
The Science Behind the Nestlé Toll House Cookie Recipe
The Role of Each Ingredient in the Recipe
Ever wonder why the Nestlé Toll House chocolate chip cookie recipe works so well? It’s all about the science behind the ingredients. Let’s break it down:
- Butter: Adds richness and helps create a tender texture. When creamed with sugar, it traps air, which makes the cookies light and fluffy.
- Sugar: Granulated sugar helps the cookies spread, while brown sugar adds moisture and chewiness. Together, they create the perfect balance of crisp edges and soft centers.
- Eggs: Act as a binder, holding the dough together, and add structure and richness.
- Flour: Provides the base structure. Too much flour can make the cookies dry, while too little can make them flat and greasy.
- Baking Soda: A leavening agent that helps the cookies rise and spread. It also reacts with the brown sugar to create a slightly chewy texture.
- Chocolate Chips: The star ingredient! They melt during baking, creating those irresistible pockets of gooey chocolate.
Why the Recipe Works Every Time
The Nestlé Toll House chocolate chip cookie recipe is foolproof because of its perfect balance of wet and dry ingredients. The ratio of butter to flour ensures the cookies spread just enough without becoming too thin. Meanwhile, the combination of sugars and baking soda creates a texture that’s both chewy and crispy.
Additionally, the recipe’s simplicity makes it easy to follow, even for beginners. By sticking to the instructions and using quality ingredients, you’re almost guaranteed delicious results every time.
FAQs About the Nestlé Toll House Chocolate Chip Cookie Recipe
Can I use margarine instead of butter?
Yes, you can use margarine, but the flavor and texture might be slightly different. Butter gives the cookies a richer taste, while margarine can make them softer and less flavorful.
How do I make my cookies softer or crispier?
For softer cookies, slightly underbake them and store them in an airtight container with a slice of bread. For crispier cookies, bake them a little longer and use more granulated sugar in the dough.
Can I freeze the cookie dough for later use?
Absolutely! Scoop the dough into portions, freeze them on a baking sheet, and then transfer to a freezer bag. Bake directly from frozen, adding an extra minute or two to the baking time.
What’s the best way to store baked cookies?
Store baked cookies in an airtight container at room temperature for up to a week. For longer storage, freeze them in a single layer and thaw at room temperature when ready to eat.
Conclusion – Why the Nestlé Toll House Recipe is a Timeless Classic

A Recipe That Brings People Together
The Nestlé Toll House chocolate chip cookie recipe is more than just a set of instructions—it’s a tradition. From its humble beginnings at the Toll House Inn to its status as a household staple, this recipe has brought joy to countless families. Whether you’re baking for a holiday, a special occasion, or just because, these cookies never fail to delight.
Endless Possibilities for Creativity
One of the best things about this recipe is its versatility. You can stick to the classic version or experiment with add-ins and variations. From gluten-free adaptations to festive holiday twists, the possibilities are endless.
A Legacy of Deliciousness
In the end, the Nestlé Toll House chocolate chip cookie recipe is a testament to the power of simple, well-crafted food. It’s a reminder that sometimes, the best things in life are also the easiest to make. So, grab your ingredients, preheat your oven, and enjoy the process of creating something truly special.

